[Final Outcome] Learning to Learn to See

Learning to Learn to See is online here
The code is available here
Firstly, Learning to Learn to See was a name I had every intention of replacing, but I never thought of a better one, so it sticks for now. I also quite like long awkward names, in a way. It is at least nice to have a reference to the original in the name of the tribute, like the tribute band Kaiser Monkey Killers - you know exactly what you’re getting.
This is naturally written in much more detail in the paper so this is mostly just a technical write-up.
Functionality
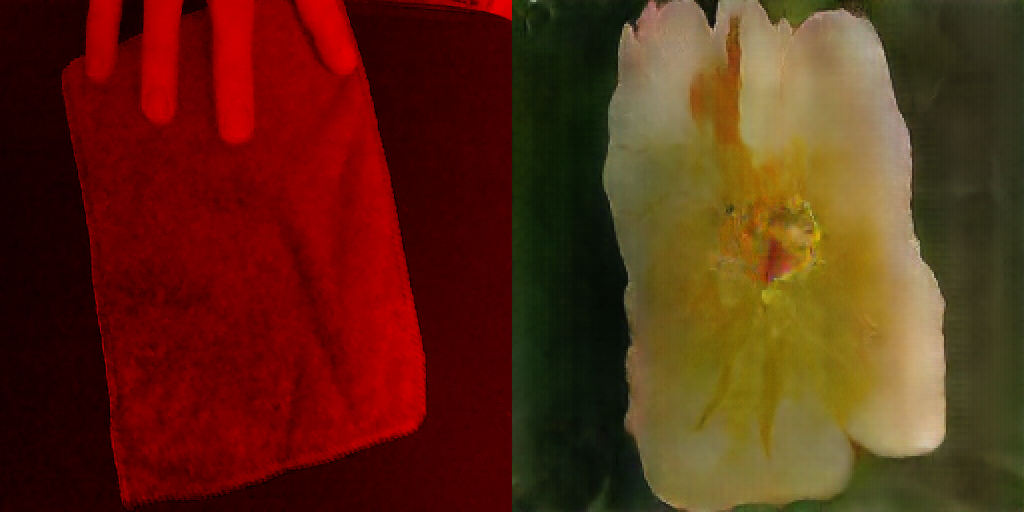
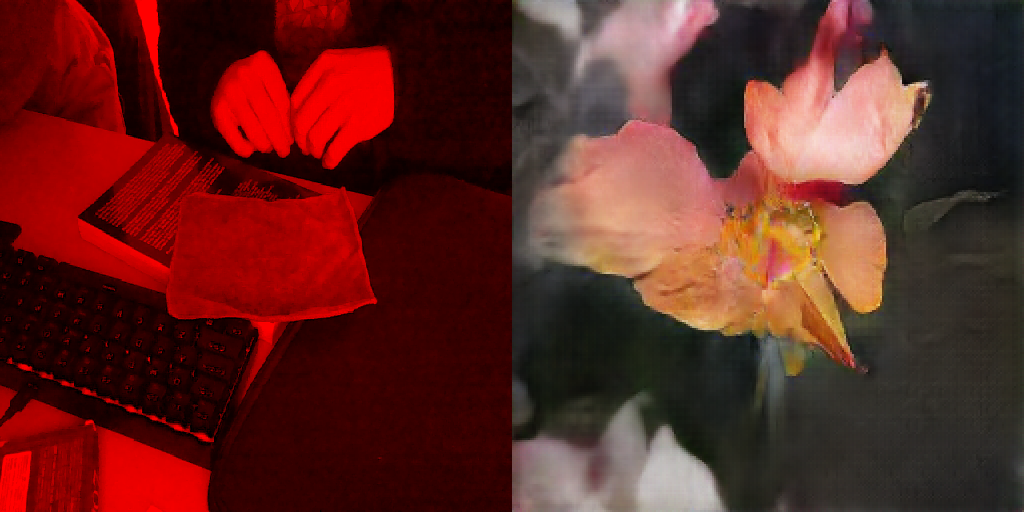
The web app has 3 models ready to go, each of varying size. The middle size was shown to be usable by the average user on an integrated graphics card; the largest being usable by those with a gaming laptop type machine with a discrete GPU; the smallest being usable on mobile! (Just about!) The quality of the output correlates with the speed that it runs pretty much, the smallest model struggling to hold much variation in the model, and the image quality drops. The largest model works on par with the original Learning to See artwork.
The user is able to upload their own model providing it has the same input/output shape as the model was trained (single channel input, 3 channel output at 256x256).
The stats which were the most useful in version one stuck around in this version and can be displayed. Step is the time for one cycle of the entire process, Average is a mean of 10 steps and FPS is calculated using these figures. FPS is kinda of weird unit really, and can be quite misleading, but it made collecting the data from other users much easier and does give a strong indication of how the model is performing - but in a dynamic system like this, 10 FPS wont look exactly like a film slowed down to 10 FPS.
WebGL Wrapper
The WebGL wrapper is a mini library, similar to the WebGL CNN structure: there is a GL_Program class which contains the boilerplate to set up a basic shader program with a framebuffer, a texture to render into, some handy uniforms and some getter functions. Instances of this class are modular and the output of once can be fed in as the input of the next. There is a parent GL_IO class to string these together and store the output in a Uint8Array using gl.readPixels(). GL_IO handles the WebGL generally so the output of the model inference is fed back into the GL_IO draw function and it displays the input and the output side by side on one canvas using the last output shader program in the chain.
Here’s the GL_IO draw loop:
draw(_in, _out, _drawProcess = false) {
  this.gl.enable(this.gl.SCISSOR_TEST);

  /* PREPROCESS PIPELINE */
  this.blur1.draw(_in);
  this.blur2.draw(this.blur1.output);
  this.blur3.draw(this.blur2.output);
  this.upscale.draw(this.blur3.output);

  /* SAVE PROCESSED INPUT INTO this.pixel_store */
  this.gl.readPixels(
    0,
    0,
    256,
    256,
    this.gl.RGBA,
    this.gl.UNSIGNED_BYTE,
    this.pixel_store
  );

  /* RENDER OUTPUT FROM MODEL */
  if (_drawProcess) this.output.draw(this.upscale.output, 0, 0);
  else this.output.draw(_in, 0, 0);
  this.output.draw(_out, 512, 0);
}
And here is an intantiation of a GL_Program:
this.blur1 = new GL_Program(gl, {
  vs_source: blur_vs,
  fs_source: blur_fs,
  attributes: ['a_position', 'a_texcoord'],
  uniforms: [
    {
      name: 'u_kernel[0]',
      location: null,
      type: 'uniform1fv',
      value: [gaussian1],
    },
    {
      name: 'u_kernelWeight',
      location: null,
      type: 'uniform1f',
      value: [this.computeKernelWeight(gaussian1)],
    },
  ],
  in: {
    w: 16,
    h: 16,
    d: 1,
  },
  out: {
    w: 16,
    h: 16,
    d: 1,
    filtering: 'LINEAR',
    offset_x: 0,
    offset_y: 0,
  },
  fbo: true,
});
The modularity worked great. It made it very easy to quickly try out different pre-processing methods: number of layers, types of filter, size of input etc.
The only other interesting part of the code is when the model does it’s thing. Framebuffer completeness rules state, in a roundabout way, that you can only render into a RGBA framebuffer of type UNSIGNED_BYTE. So, slightly annoyingly, you need to strip the red values out the array from the preprocssing, which is done using the helper fiter function const red = (el, i, arr) => i % 4 === 0;. This is then converted to a tensor and given to TensorflowJS:
async function predict(model, pixels) {
  const red = (el, i, arr) => i % 4 === 0;

  const logits = tf.tidy(() => {
    // Take only Red value from RGBA data
    const redChannel = pixels.filter(red);
    const img = tf.tensor(redChannel, [256, 256, 1]).toFloat();

    const offset = tf.scalar(127.5);
    const normalized = img.sub(offset).div(offset);

    const batched = normalized.reshape(MODEL_INPUT_SHAPE);
    return model.predict(batched);
  });

  const output = await postProcessTF(logits);
  const data = await output.data();

  glio.draw(video, data, SHOW_PREPROCESS);

  output.dispose();
  logits.dispose();
}
The rest is mostly boring stuff to make it a usable website with buttons and stuff.

Summary
In all I am quite pleased. It hasn’t really seen the light of day yet. It’s been tested by enough people to write about, but it hasn’t been through the ringer, so to speak. I am excited to get feedback from the wider world though, from people that aren’t inherently interested in machine learning and would be seeing it with “untrained” eyes and with a more honest approach to the interaction.
There is a lot more that could be done to potentially improve it further but that’s mostly in the model architecture and training side of things. I would love to develop something like Auto-Pix2Pix a bit more to really make it easy for people to train models and put them to use on the web app.
I would also like to make a version which could be fullscreened and become more of a standalone piece. As it stands it still looks like, and is, and testing framework/proof of concept.